


fig1
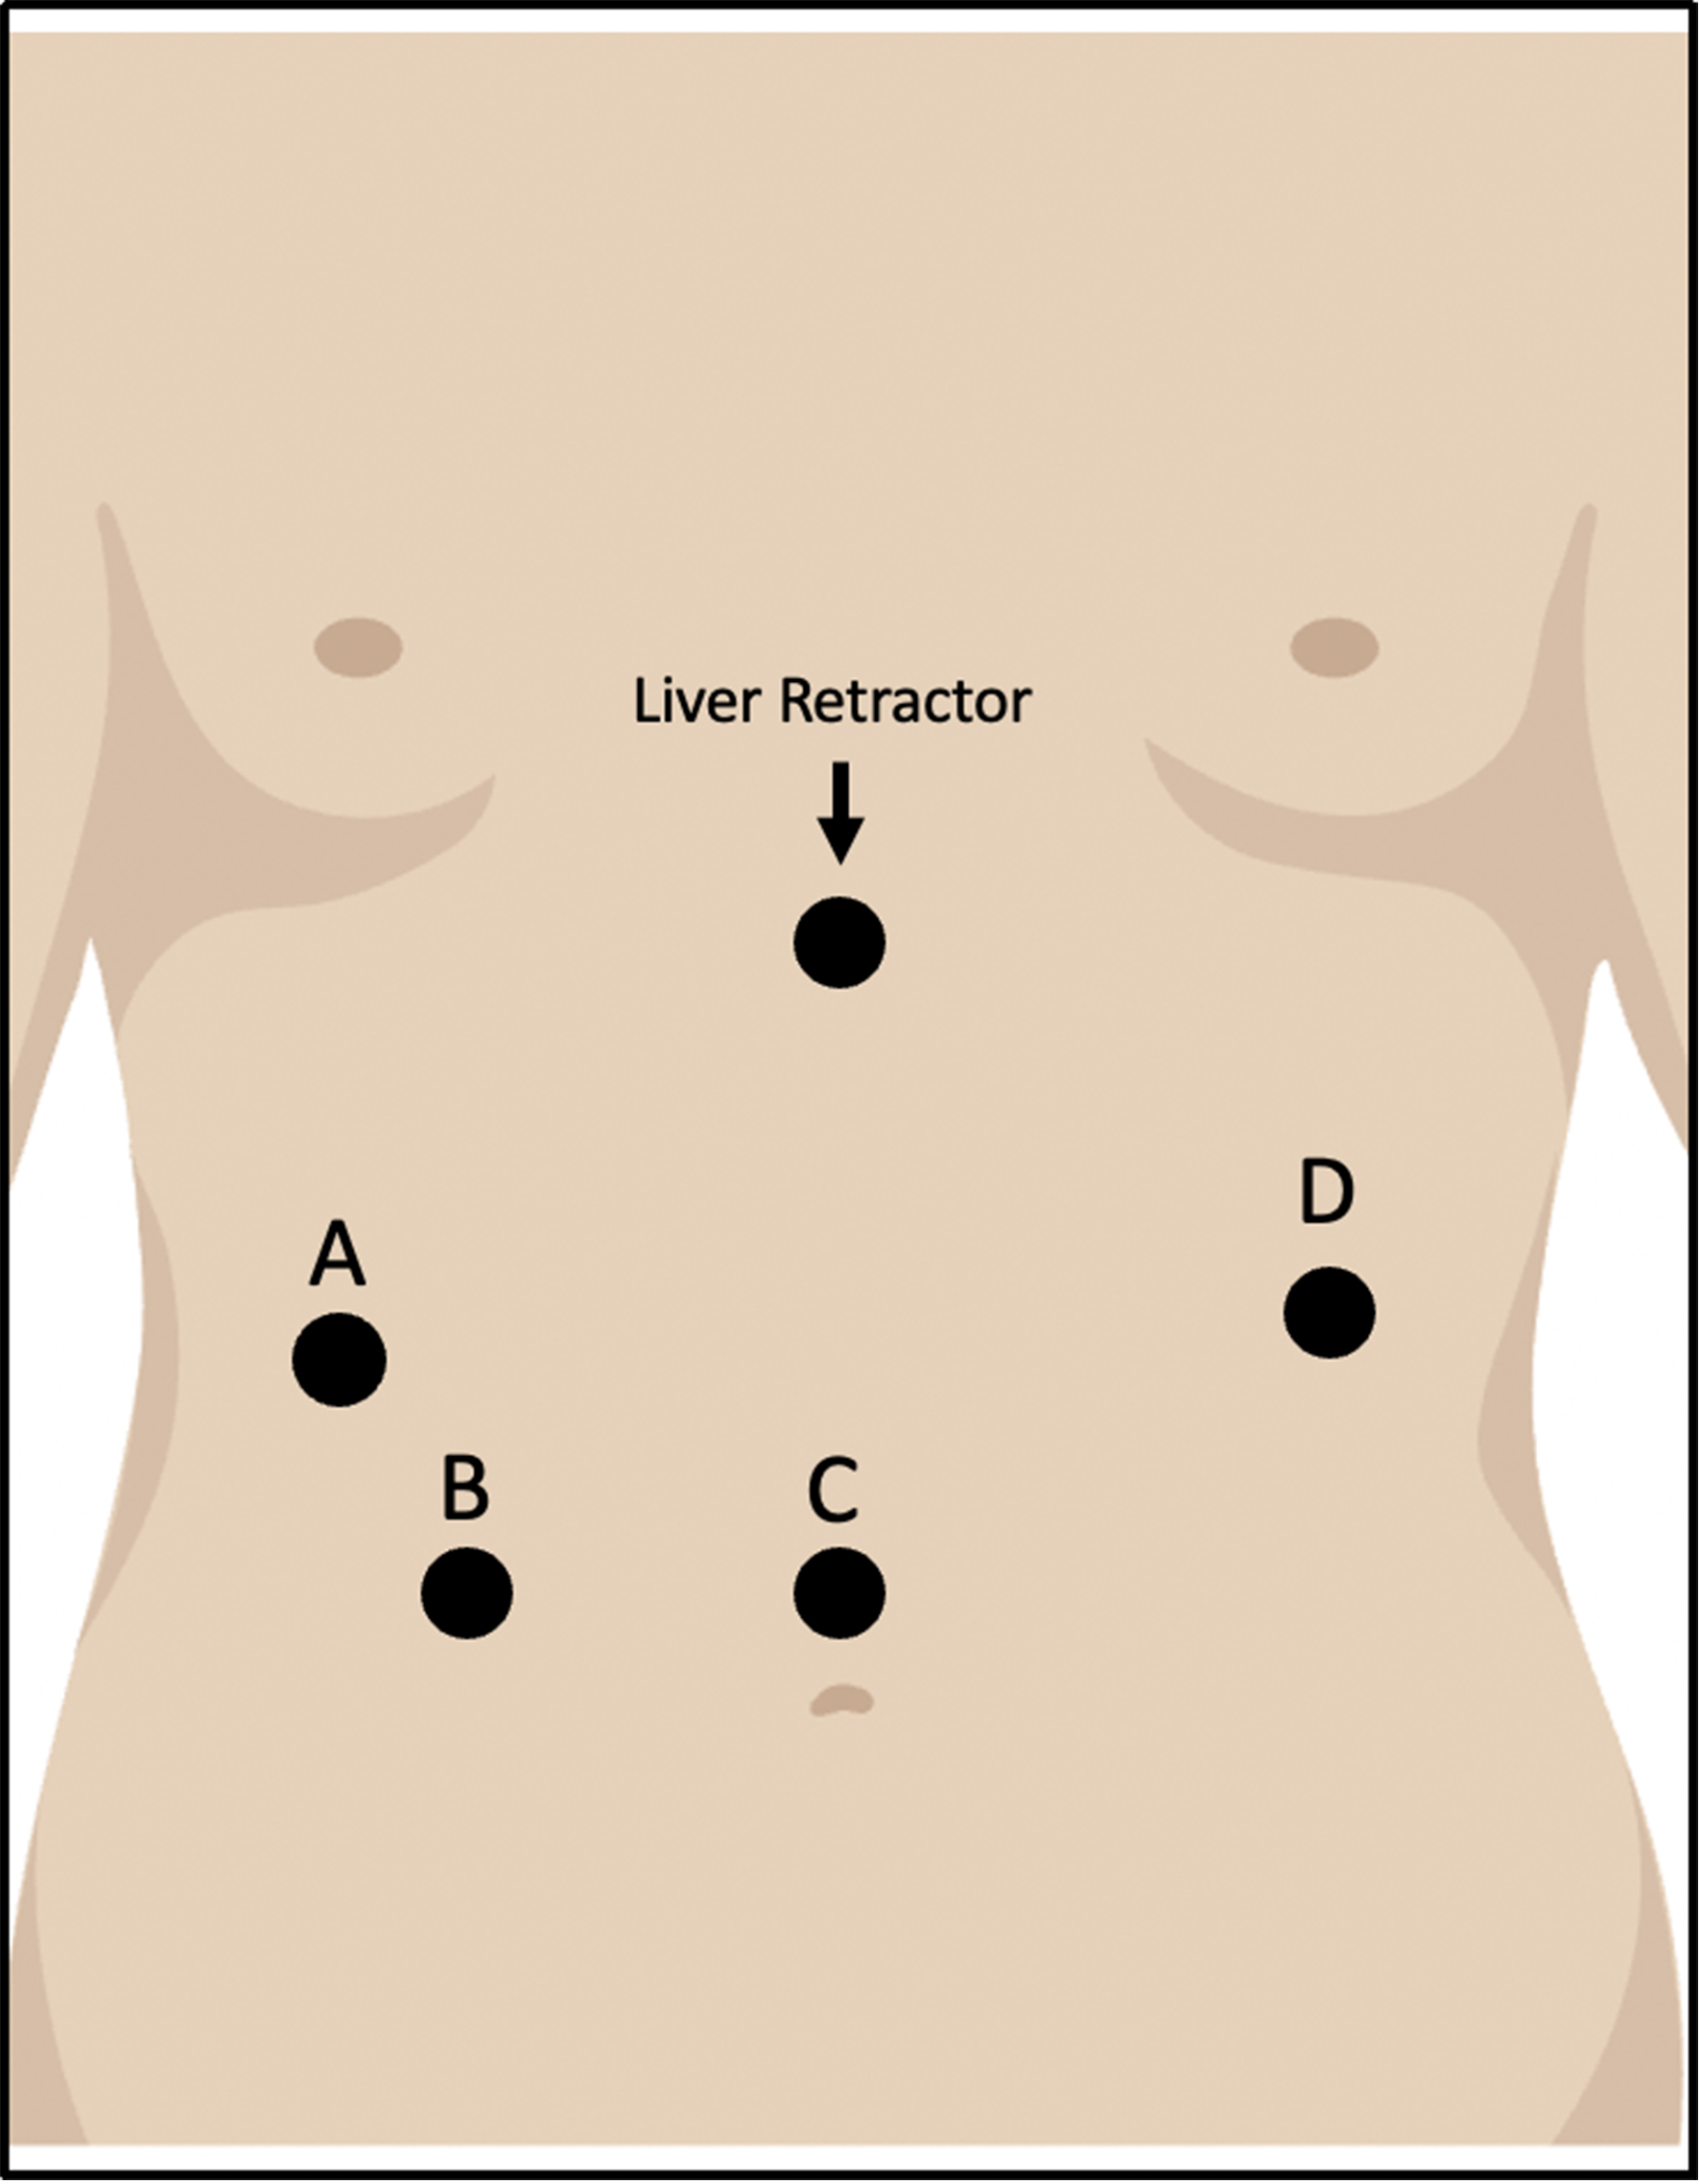
Figure 1. Trocar positions for RAHM. A and D: Working ports; B: Auxiliary port; C: Camera port. RAHM: Robotic-assisted Heller myotomy.
Figure 1. Trocar positions for RAHM. A and D: Working ports; B: Auxiliary port; C: Camera port. RAHM: Robotic-assisted Heller myotomy.


All published articles are preserved here permanently:
https://www.portico.org/publishers/oae/